

Discussion Board
Pawtograder’s discussion board feature allows students and staff to discuss course content and ask questions. It is not intended to be a replacement for office hours, although there is an option to format the post as a question that needs an answer (as opposed to a “note” that does not need an answer). Posts are formatted as Markdown and support drag-and-drop image uploads, making it easy for students and staff to share screenshots, diagrams, and other visual content.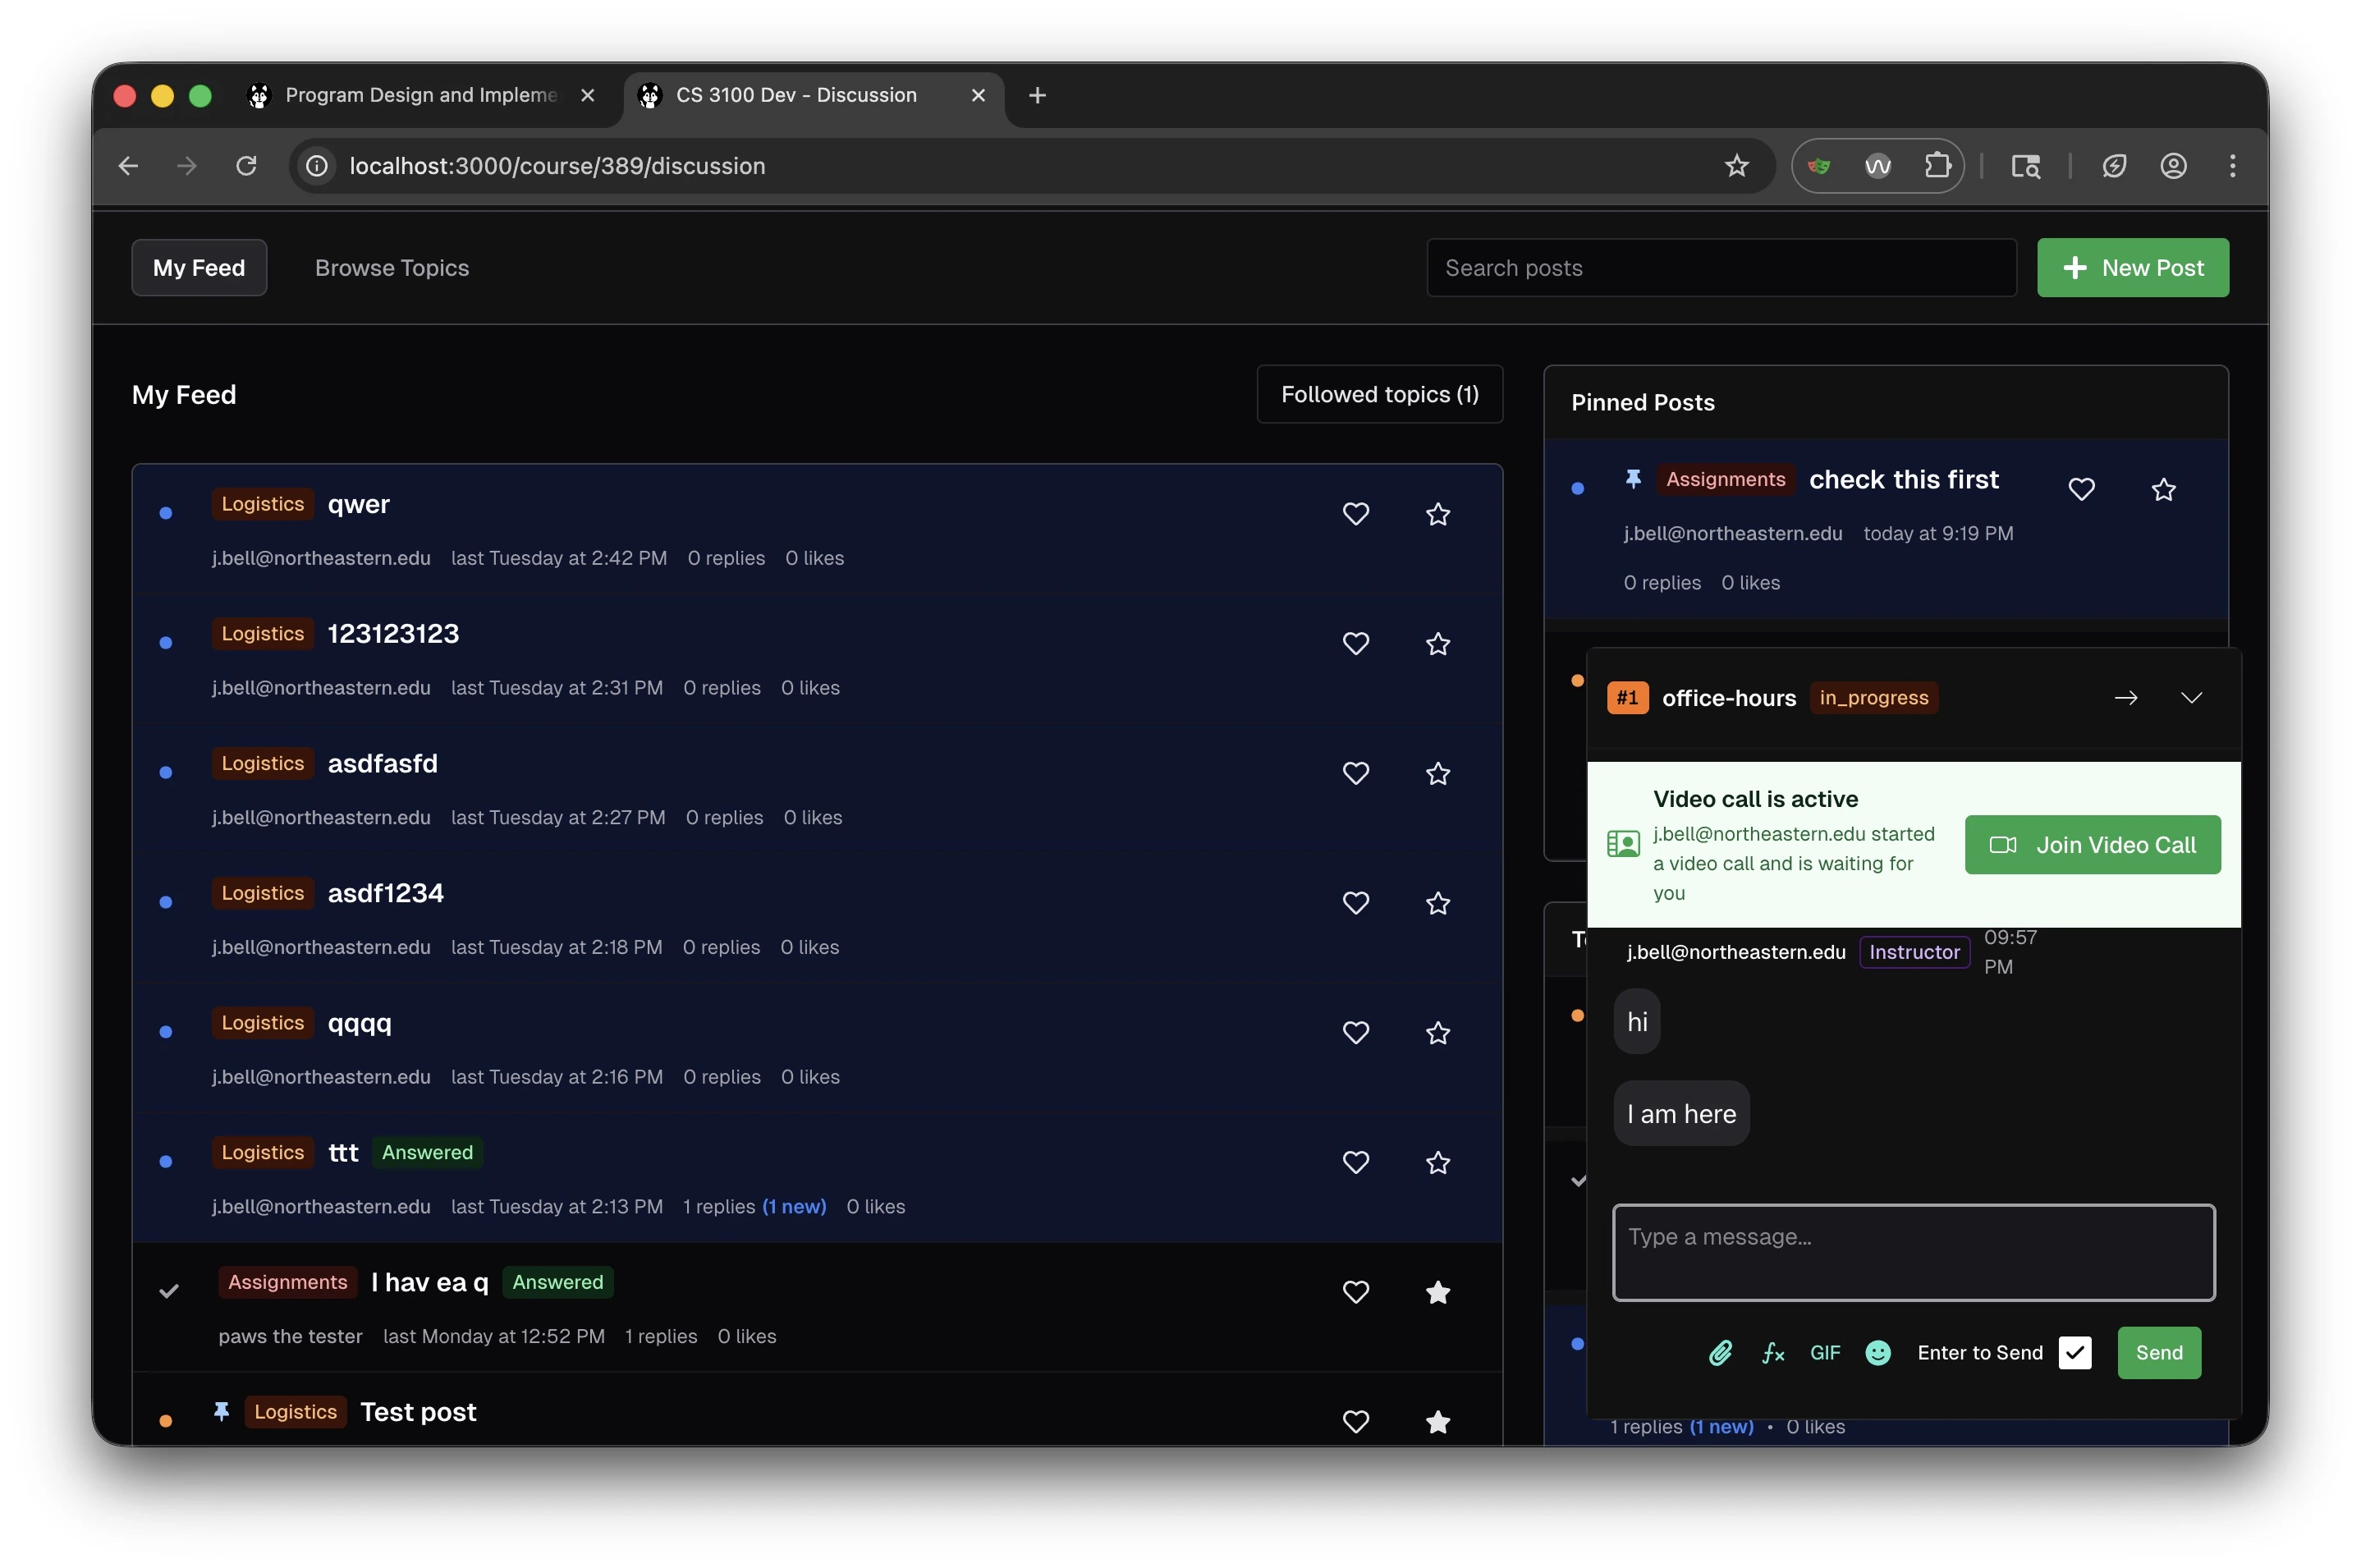
Key Features
Feed and Topic Organization
The discussion board uses a feed-based layout with two main views:- My Feed: Shows all posts relevant to you, including posts from topics you follow
- Browse Topics: Allows you to explore posts organized by topic categories
Pinned Posts
Instructors can pin important posts that appear in a dedicated “Pinned Posts” section in the sidebar. This is useful for:- Highlighting frequently asked questions
- Surfacing important announcements
- Drawing attention to helpful resources
Post Visibility and Identity
Posts can be shared with the entire class, or with course staff only. Each user in a class has a pseudonym, and can choose to use their real name or their pseudonym. Staff can always see the real name of a user. Students can edit their own posts, and staff can edit any post.Post Metadata
Each post displays:- Topic tag: Color-coded category (e.g., “Logistics”, “Assignments”)
- Author: The poster’s identity (real name or pseudonym)
- Timestamp: When the post was created
- Reply count: Number of responses, with indicators for new replies
- Like count: Community engagement metric
- Karma: Points earned by users for helpful contributions
- Answered badge: Indicates whether a question has been resolved
Image Uploads
The discussion board supports drag-and-drop image uploads for both posts and replies. Users can:- Drag image files directly into the post editor
- Paste images from the clipboard
- Click the image button in the toolbar to upload from your computer
- Screenshots of errors or code output
- Diagrams and visual explanations
- Terminal messages and assignment-related images
Karma System
Karma counts the likes a user’s discussion posts have received. Each like adds a point, removing a like takes one away, and karma never drops below zero. Nothing else moves the number: marking an answer, replying, and posting frequently all leave karma unchanged. A user’s karma appears next to their name on threads and replies. Staff can see every student’s karma on Course Settings → Discussion Engagement, alongside that student’s post, reply, likes-received, and likes-given counts.Enabling Karma
Karma is part of the Discussion feature rather than a separate setting. It is active in any course where Discussion is enabled under Course Settings → Feature flags, and there are no karma weights or other karma options to configure. Turning the Discussion flag off hides the discussion board from the course menu for everyone, karma included.Using Karma as an Instructor
You can use karma scores to:- Identify active and helpful students
- Recognize students who contribute to peer learning
- Award participation credit based on discussion board engagement
- Encourage quality contributions over quantity
Best Practices
- Set expectations: Explain to students how karma works and what behaviors are rewarded
- Recognize contributions: Encourage students to like helpful posts
- Mark answers: Use Mark as Answer on the best reply to a question so the thread stops showing as unanswered
- Monitor for quality: Ensure students are providing helpful content, not just posting for points
Error Pins
An error pin attaches one discussion thread to autograder results that match rules you write. Where a pin matches, the student sees a link to the thread in their autograder results, so a student hitting a problem the staff have already explained is pointed at the explanation instead of asking again. Two things about this are easy to get wrong. The matching is not a text search: nothing compares a student’s error message to the wording of your posts, so a pin fires only where your own rules say it should. And nothing restricts a pin to failures — a rule on a check’s name or a score range will match a submission where that check passed. Nothing exists until you create it; a course with no pins shows students no extra panel. This is also unrelated to the thumbtack that pins a thread to the top of the discussion board. The two features share only the word.Creating an Error Pin
The control is an icon button labelled Manage Error Pins on the thread itself, not a class-wide screen.1
Open the thread
Go to the discussion thread that explains the problem. Only graders and instructors see
the button.
2
Choose the scope
Pick a single assignment, or All Assignments (Class-Level) to match across the whole
course.
3
Write the rules
Each rule targets one part of the autograder result: a check’s name, its part, or its
output; output a student cannot see; the autograder’s own output; the lint output;
whether linting failed; or a check score or overall score falling inside a range. Each
rule matches by contains, equals, regex, or range, and rules on check fields can
be narrowed to particular checks by a name pattern.
4
Preview
Preview reports how many submissions the rules currently match, with a sample. Use it —
a
contains rule on a common word matches far more than you expect.5
Save
Save the pin. It applies to matching submissions going forward.
Rule Logic
- AND logic — every rule must match before the thread is linked.
- OR logic — any single rule matching is enough.
Managing Pins on a Thread
The same Manage Error Pins button lists the pins already on that thread, each with its scope, whether it is enabled, and how many submissions it has matched. From there you can create another, edit the rules, enable or disable one without deleting it, or delete it. There is no screen that lists every pin in the course, so a pin is only findable from the thread it belongs to — worth keeping in mind before you scatter them across many threads.A pin created after a submission has already been evaluated may not reach that
submission. If you add a pin partway through an assignment, expect it to apply to later
work rather than retroactively to everything.
Writing Pins That Work
- Let the rules do the matching, not the post. Nothing compares the wording of your thread to a student’s output, so pasting an error message into the post achieves nothing on its own. What decides whether a student sees the thread is the rule you write against the autograder result — a check’s name, its output, or a score range.
- Start from a real failure. Open a submission that hit the problem, find the
check or output that identifies it, and write the rule against that. Guessing at
a
containsstring usually matches either nothing or almost everything. - Preview before saving. The match count tells you which of those two you have.
- Write the thread for someone stuck. A student arrives at it mid-problem with no other context, so lead with the fix.
- Revisit as the assignment runs. New failure modes appear once a cohort is working; a pin added late applies to later submissions rather than retroactively.
Active Help Request Integration
When a student has an active help request in office hours, a widget appears in the discussion board sidebar showing:- The current status of their help request (e.g., “in_progress”)
- Video call notifications when staff starts a video chat
- A Join Video Call button for quick access to help sessions