

Surveys
Pawtograder’s surveys feature allows you to provide feedback on courses, assignments, and instructors. Your responses help improve the learning experience for everyone.Accessing Surveys
Navigate to the Surveys tab in the main navigation menu to see all surveys assigned to your course. You’ll also see incomplete surveys highlighted on your dashboard.If there is no Surveys tab, your instructor has turned the Surveys feature off for the course. A survey also stays hidden until its available date passes, and instructors can assign a survey to a subset of students rather than the whole course.
Dashboard Survey Notifications
Your student dashboard displays a Surveys to complete banner listing every available survey you have not submitted yet. Each row shows:- Status badge: Overdue (red), In progress (yellow), or Pending (blue)
- Due date: Relative text, such as “Due in 2 days” or “Was due 3 hours ago”
- Action button: Take survey, or Continue if you have a saved draft

Survey Cards
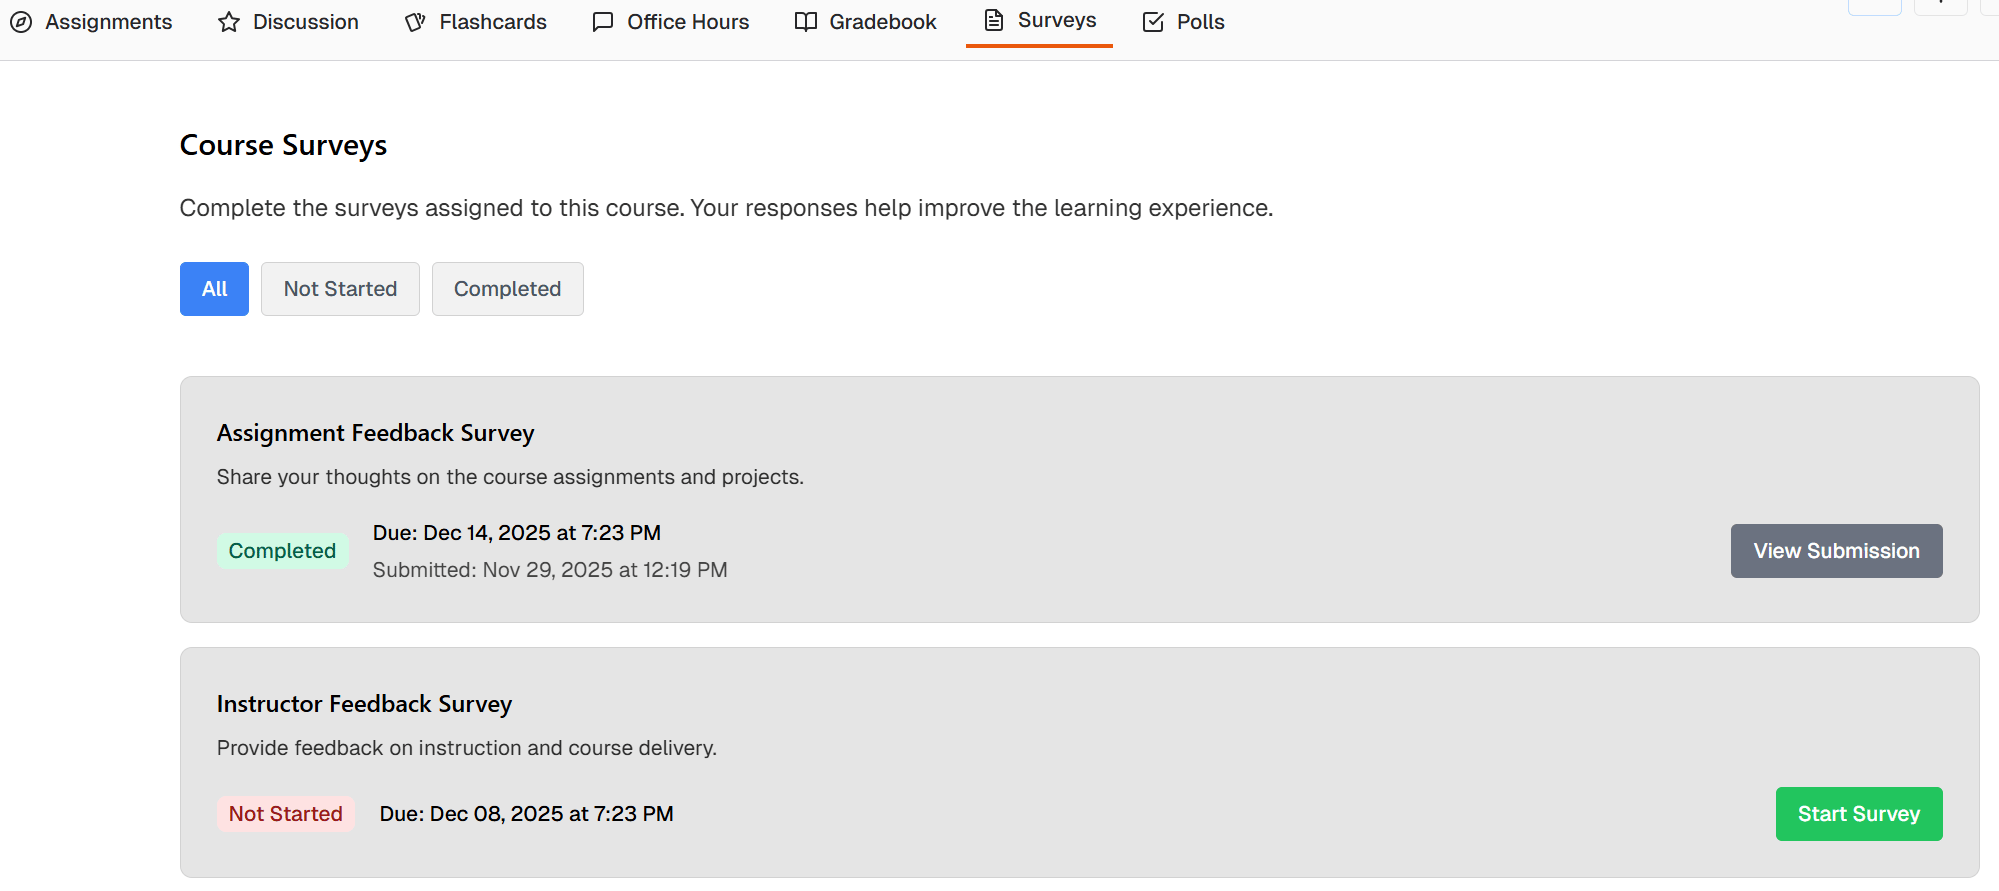
Each survey card displays:- Survey title and description: What the survey is about
- Due date and time: When your instructor asked you to complete it (shown in your course time zone)
- Current status: Your progress on the survey (Not Started, In Progress, or Completed)
- Submission timestamp: When you submitted (if completed)
Survey Status Filters
Use the filter buttons at the top of the surveys page to find specific surveys:Understanding Survey Status
On the Surveys page, your progress on each survey is shown with a badge — Not Started, In Progress (red), or Completed — and the action button matches it: Start Survey, Continue Survey, or View Submission. The dashboard’s Active Surveys card uses a longer set with its own colors: Not started (blue), In progress (yellow), Submitted (editable) (green), and Submitted (locked) (gray), with buttons Start, Continue, Edit, and View. The banner above it uses a third set: Overdue (red), In progress (yellow), Pending (blue), with Take survey or Continue.The same survey can be labelled three different ways depending on where you see it, and the colors differ too — a survey in progress shows red on the Surveys page and yellow on the dashboard. The status is the same either way; only the styling changes.
Taking a Survey
Starting a New Survey
- Find a survey with “Not Started” status
- Click the green Start Survey button
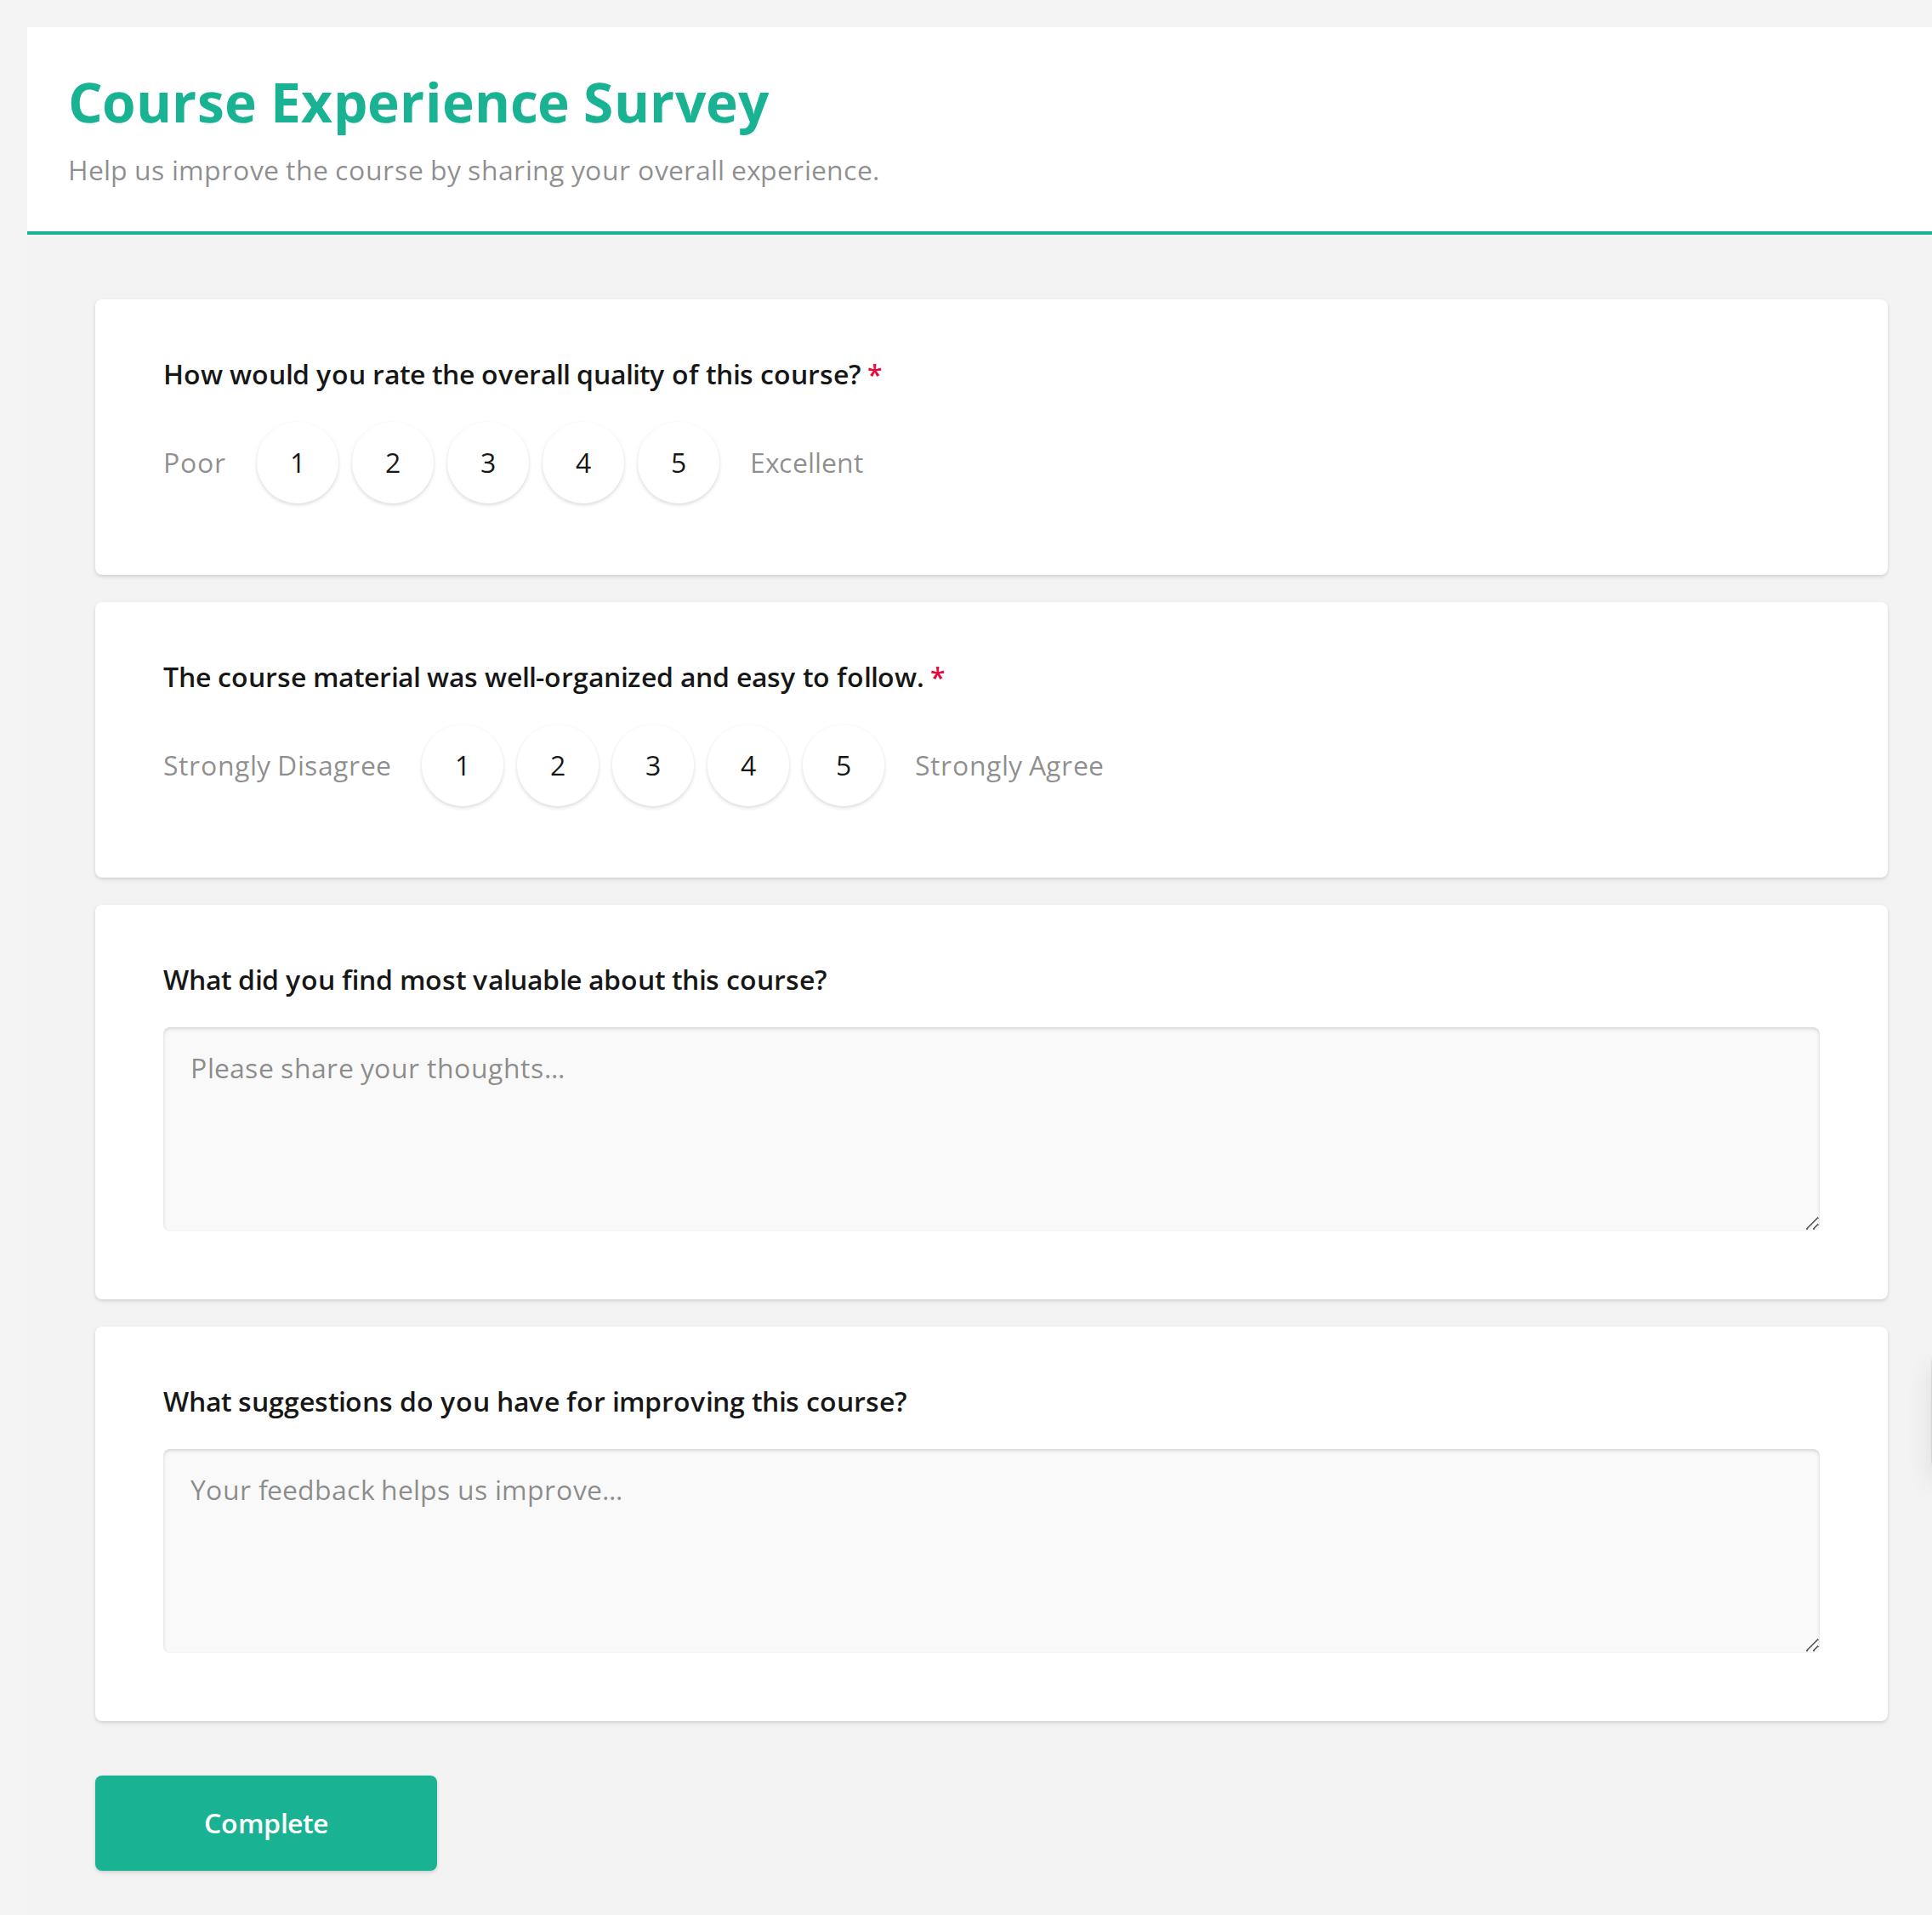
- Read each question carefully
- Complete all required questions (marked with a red asterisk *)
- Click Complete to submit your responses
Continuing an In-Progress Survey
If the survey allows editing, your answers are saved as you go, so an unfinished survey is waiting for you where you left it. (If it does not allow editing, nothing is saved until you submit — see the note below.) To pick a draft back up:- Find the survey with In Progress status
- Click Continue Survey
- Your earlier answers are already filled in, so you pick up where you left off
- Complete any remaining questions and click Complete to submit
Survey Due Dates
Each survey shows a due date set by your instructor. The due date is a soft deadline: after it passes the survey is flagged as overdue, but it still accepts responses. Late submissions are not blocked.Your submission time is recorded and visible to your instructor, so submit by the due date whenever you can. A survey stops accepting responses only when your instructor closes it, which also removes it from your Surveys page.
Editing Your Responses
Some surveys allow you to edit your responses after submission. When editing is enabled, you’ll see a green notification:“You can edit your response since editing is allowed for this survey.”To edit a completed survey:
- Click View Submission on the survey card
- Modify any of your responses
- Click Complete to save your changes
“This survey has been submitted and cannot be edited.”Your original responses will be shown in read-only mode.
Not all surveys allow editing after submission. Check for the editing notification before assuming you can make changes later.
Viewing Your Submissions
To review what you submitted:- Find the survey with “Completed” status
- Click View Submission
- Your submitted answers will be displayed
Question Types
Surveys may include different types of questions:Tips for Completing Surveys
- Read questions carefully: Make sure you understand what’s being asked
- Answer honestly: Your genuine feedback helps improve the course
- Complete required questions: Questions with a red asterisk (*) must be answered
- Don’t wait until the last minute: Submit before the deadline to avoid issues
- Check your responses: Review your answers before clicking Complete