

Testing an Assignment
The Test Assignment page gives you a repository of your own for an assignment, provisioned exactly like a student’s. You can push to it, watch the autograder run, open the resulting submission in the grading interface, and apply rubric checks — a complete end-to-end rehearsal before students see the assignment. Your test submission stays out of the grading roster. The assignment dashboard’s submission table and the Rerun Autograder table are both built from enrolled students, so nothing you push can be mistaken for student work. Test Insights is the exception — see Where test submissions show up.Testing an assignment is not the same as looking at the course through a student’s eyes. For that, use View as student on the course home page: pick any enrolled student and see their whole course, read only. That control is instructor-only. The Test Assignment page’s Preview as student button is much narrower — it shows your own submission under student rules, for one assignment.
Create your test repository
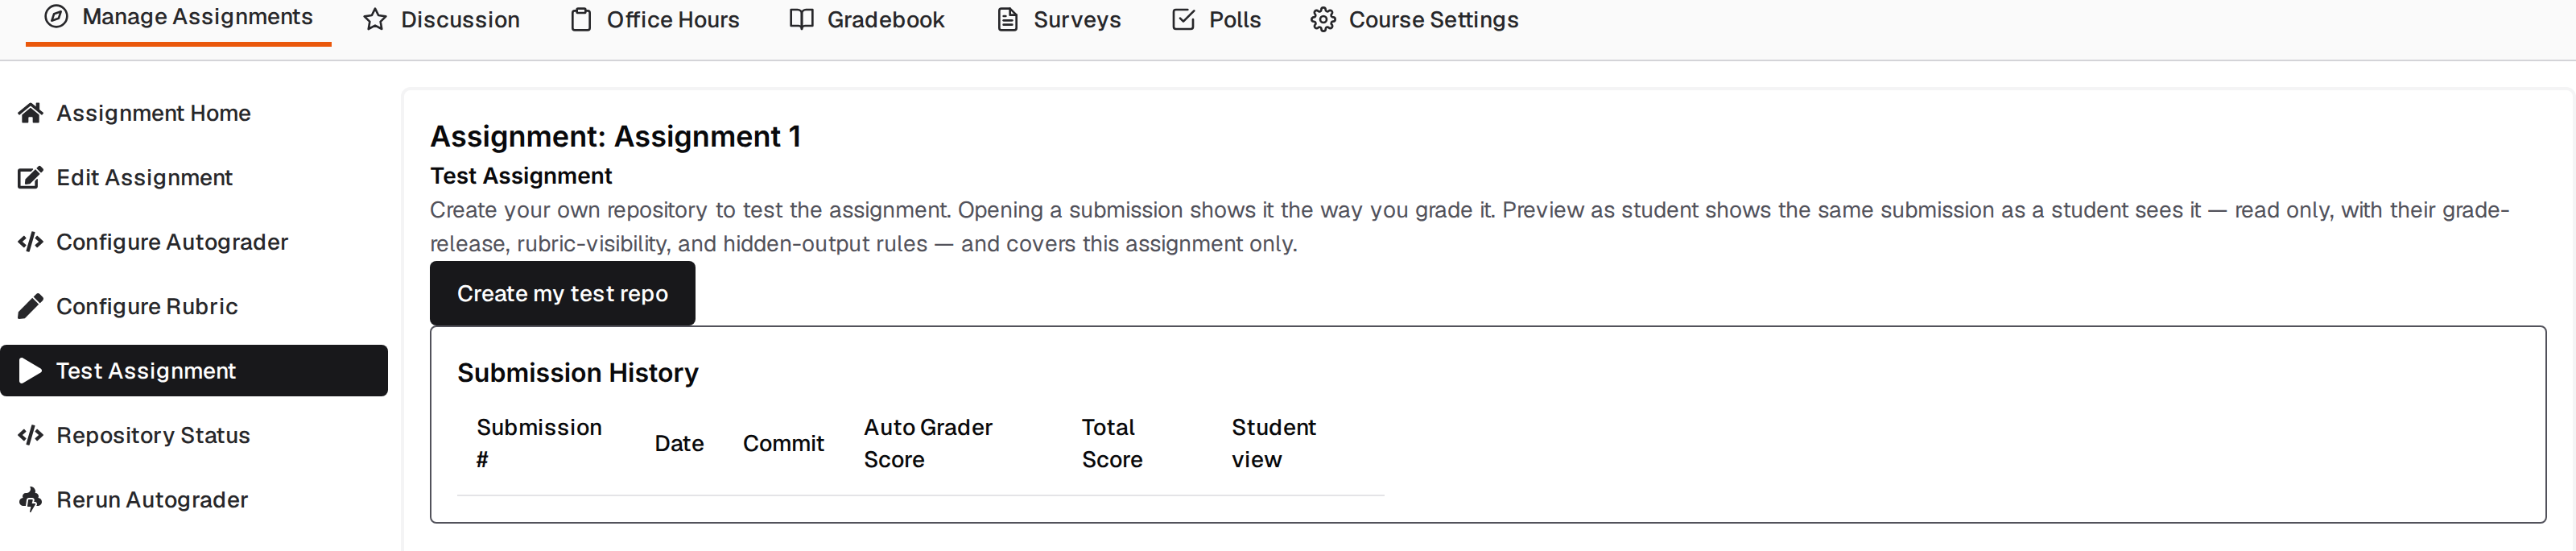
- Open the assignment and select Test Assignment in the left sidebar.
- Click Create my test repo. The label changes to Creating your test repo… while the request runs.
- On success you get a Test repository created toast reading “Your test repository for this assignment is ready. Refresh to see it.” Reload the page and the button is replaced by a Repository box linking to the new repo on GitHub.
- Your Pawtograder account must have a GitHub username linked. Without one the request fails with “User has no Github username linked”.
- The assignment must have a template (handout) repository configured. Without one the request completes but creates nothing.
- You must be an instructor or grader in the course. Staff test repositories are refused for anyone else.
Push a commit and check the submission
Commit and push to the test repository the way a student would. The autograder runs on the push, and the resulting submission appears in the Submission History table on the Test Assignment page. That table lists only your own submissions, so it is empty until you create the repository and push something — an empty table here does not mean the assignment is broken. The columns are:
The Commit History button above the table opens the repository’s commit list.
Grade your test submission
Clicking a row opens the submission in the staff grading view — the same interface you use on a student’s work, not the student-facing one. Every submission gets a grading review as soon as it lands (provided the assignment has a grading rubric), so you can apply checks, leave annotations, and complete the review on your test submission exactly as you would on a real one. The submission page has these tabs: Grade, Autograder Detail, Files, plus Checks and Deployments on pull-request assignments and Repo Analytics when the assignment has repository analytics enabled. Two navigation controls are worth knowing:- When the assignment has more than one rubric, the grading sidebar shows a Select active rubric dropdown listing each one as
Active Rubric: <name>. With a single rubric the dropdown is hidden. - The staff toolbar above the submission has a submission picker (“Select any submission to view…”), grouped into Students and Instructors & Graders. Use it to jump between your test submission and real ones.
Preview as student
The Test Assignment page explains the difference in its own words:Create your own repository to test the assignment. Opening a submission shows it the way you grade it. Preview as student shows the same submission as a student sees it — read only, with their grade-release, rubric-visibility, and hidden-output rules — and covers this assignment only.Click Preview as student on a submission row to enter the preview. An orange banner appears reading “Previewing your own submission as a student — read only, and only for this assignment. Navigate away to return to your staff view.”, with an Exit student view button.
The preview is your own staff profile wearing a student’s view, so pages that depend on a real student enrollment — the student assignments dashboard, for instance — have nothing to show for it. That is why the preview is scoped to the assignment you opened it from and ends as soon as you navigate elsewhere. To see enrollment-keyed pages, use View as student from the course home page instead.
Where test submissions show up
Because a test submission belongs to a staff profile rather than an enrolled student, it is included on some surfaces and excluded from others:- Excluded from the assignment dashboard’s submission table and the grade exports built from it. That table enumerates enrolled students, so your test submission cannot leak into student grades.
- Excluded from the Rerun Autograder table, which also lists student rows only. You cannot batch-rerun the autograder on your own test submission — push another commit instead.
- Included in Test Insights. Its statistics and error grouping count every active submission on the assignment regardless of role, so your test submission contributes to Total Submissions, pass rates, and error groups. Discount it when reading class-wide numbers.
- Included on the Repo Analytics tab when the assignment has repository analytics enabled — a staff test repository is treated like any other. See Repository Analytics.