

Completing a Self-Review
What your instructor configured wins. This page describes how Pawtograder behaves in the setup most courses use. Almost every rule below is a per-assignment or per-course setting, and your instructor chose the settings for your course on purpose, as part of how they want the course to run. So if your assignment behaves differently from what you read here, the most likely reason is that your course is set up differently, by design. Your assignment page and your course’s own policies are the authority on what applies to you. Ask your course staff if you are not sure, or if what you see looks wrong rather than merely different.
If your due date moves — a late token, an instructor-granted extension, or a change to the assignment’s own due date — your self-review deadline shifts by the same amount, so your window stays the same length. If your deadline changes after you have already finished the self-review, the deadline on record still moves; the work you already did is not affected.
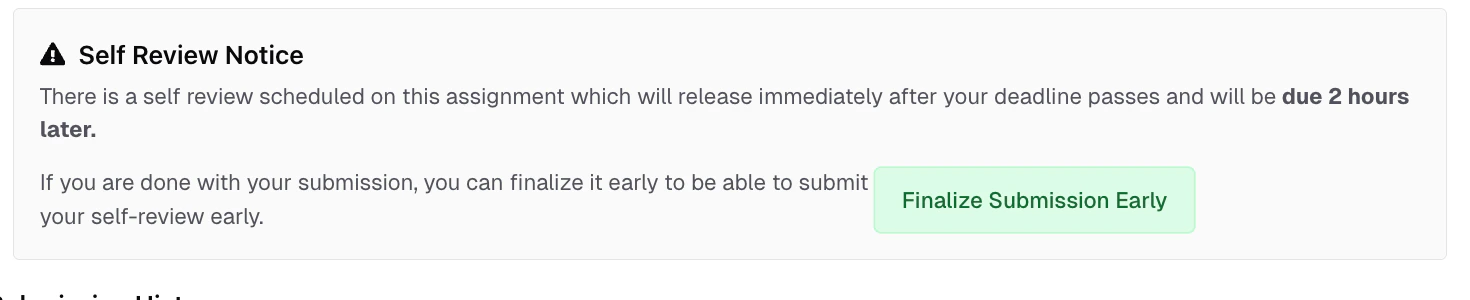
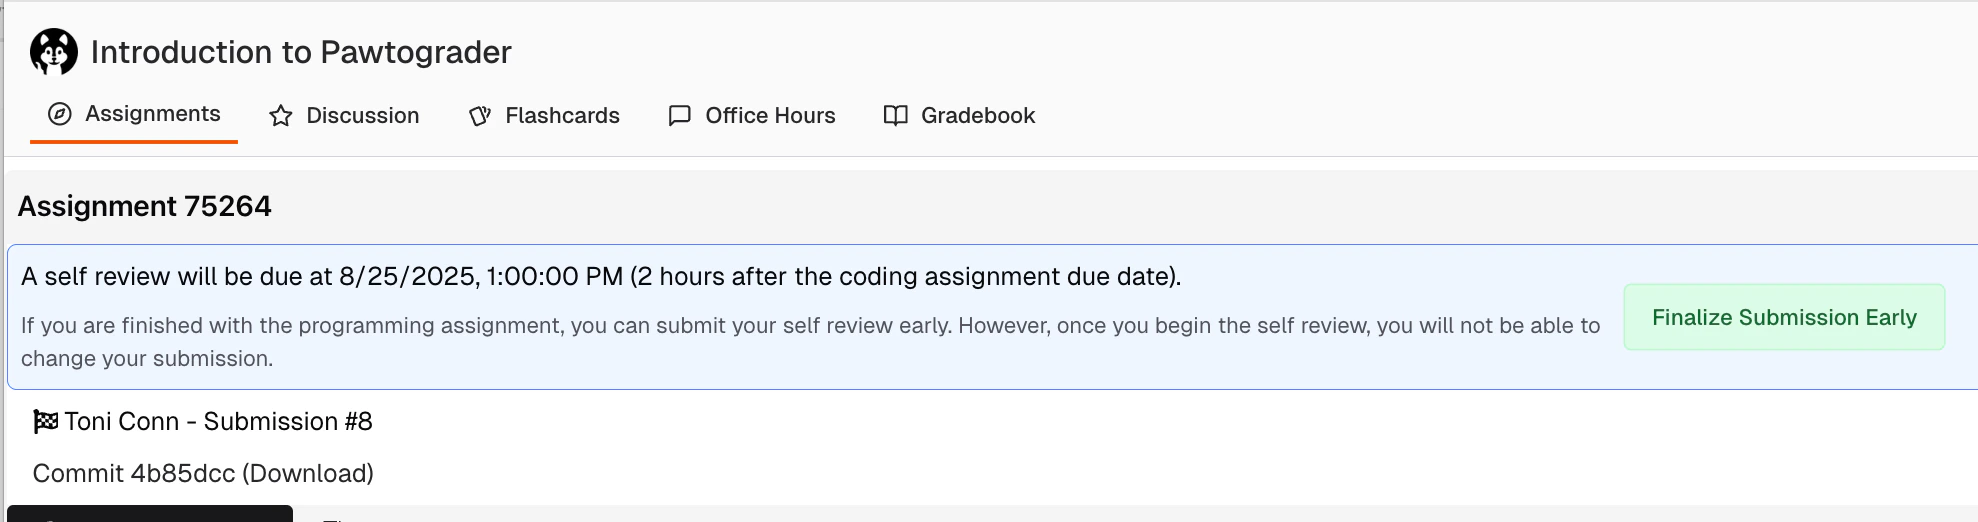
Completing a Self-Review
Once your self-review is available, you will see a banner indicating when it is due. On the right hand side of the page, you’ll see a “Self-Review Rubric” section. Items outlined in red are required to be completed.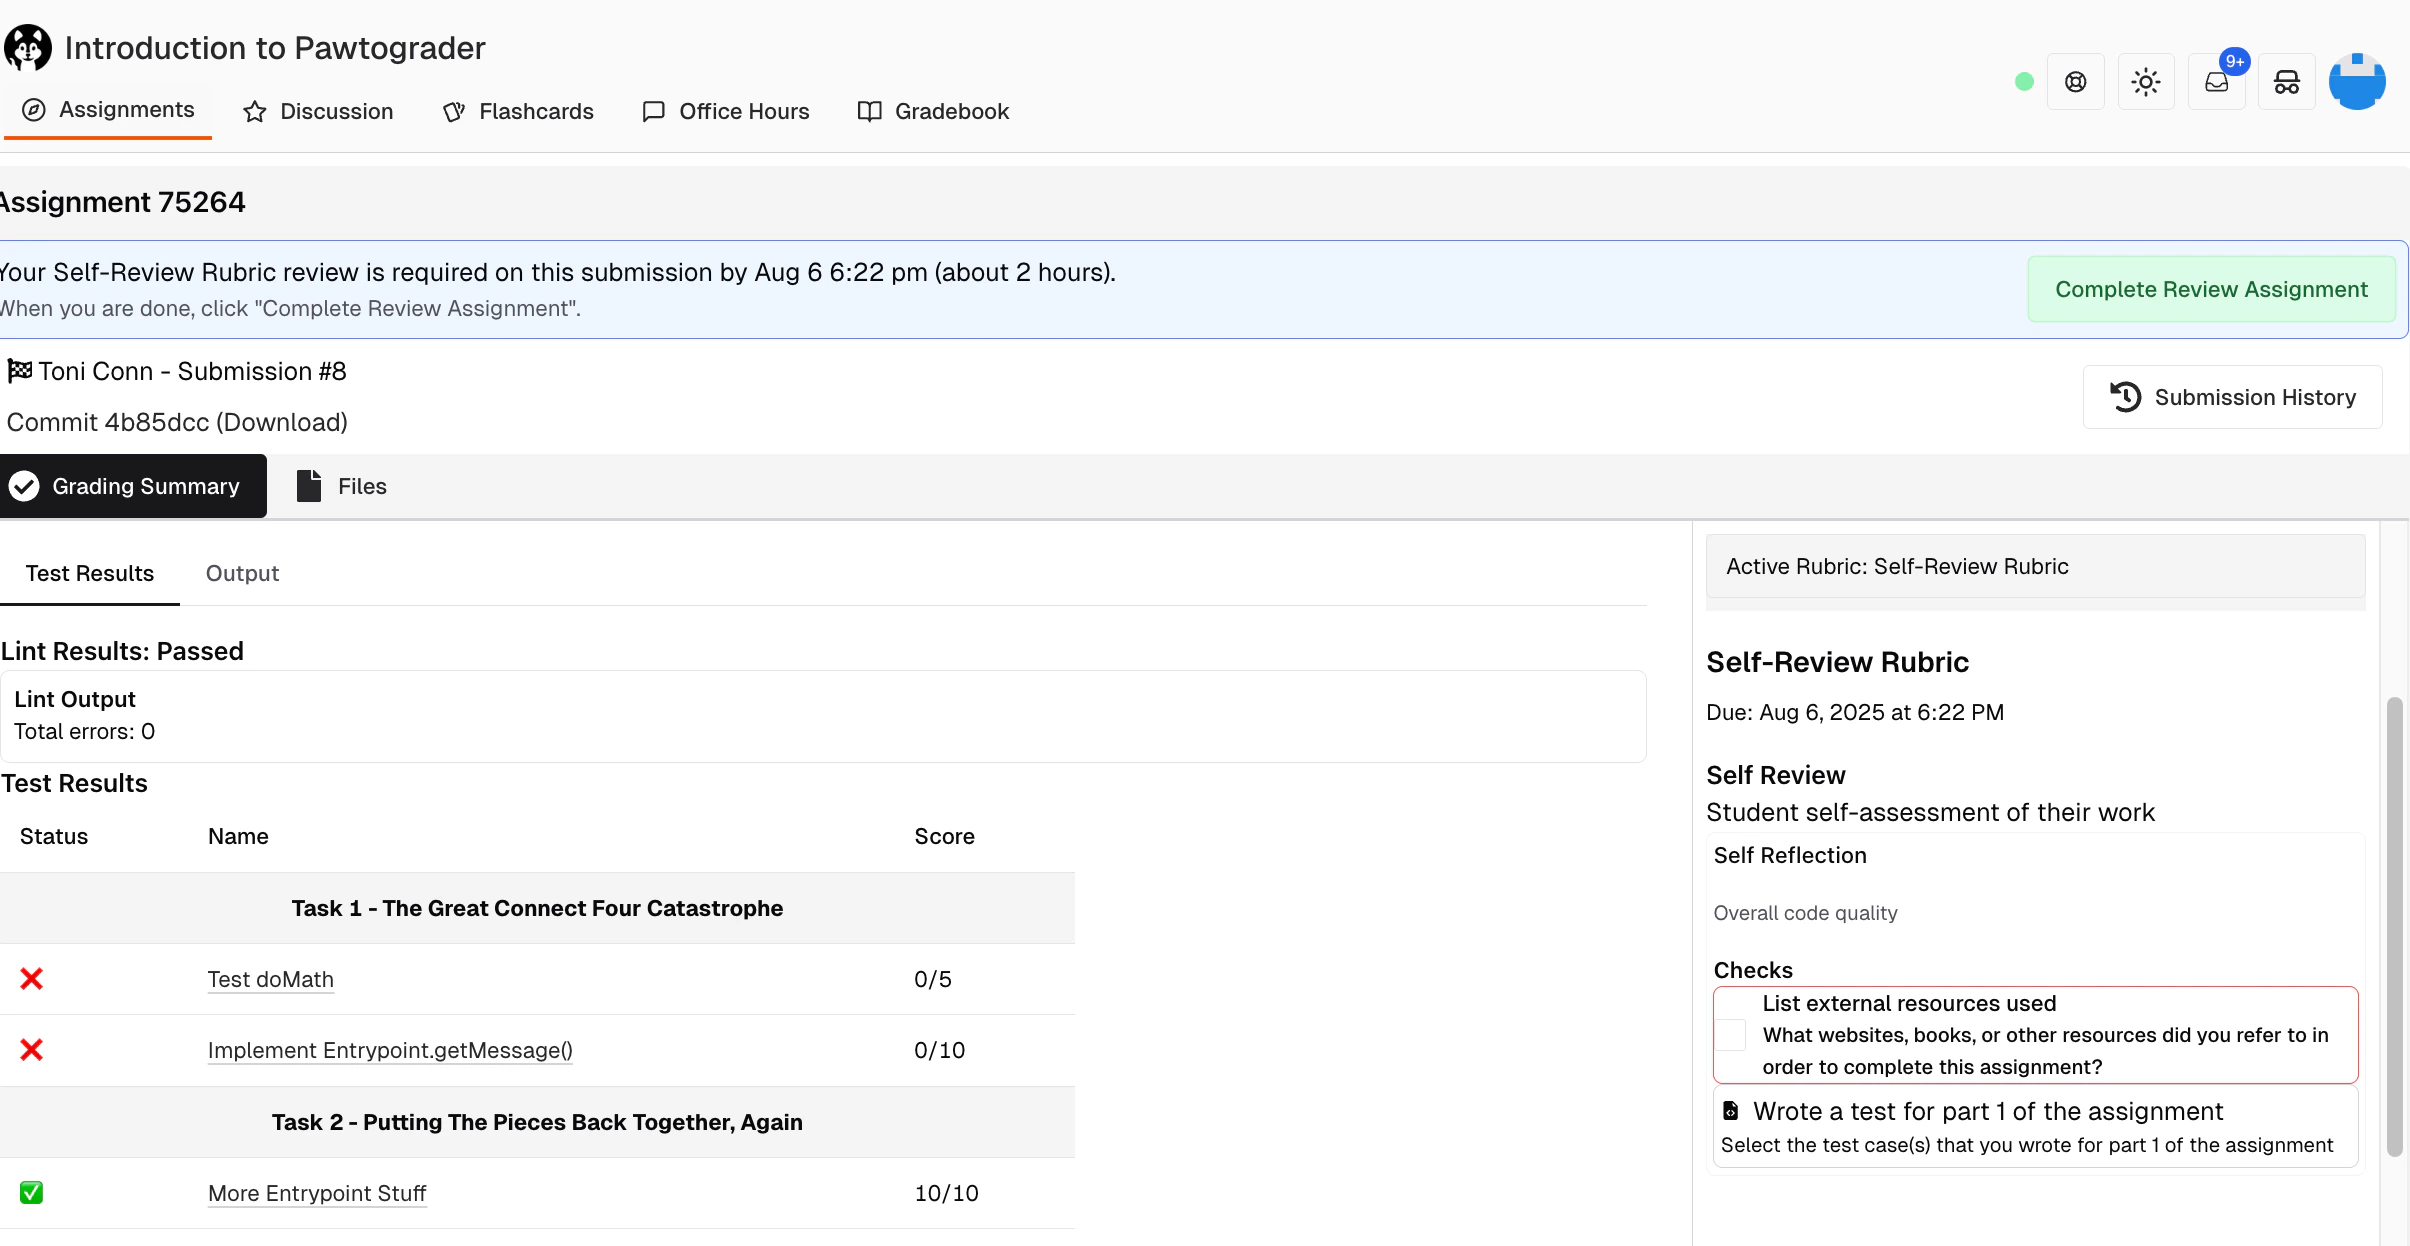
- List external resources used (submission-level check)
- Wrote a test for part 1 of the assignment (file-level check)
Turning on rubric descriptions
By default the rubric sidebar shows you only the name of each part, criteria, and check. Your instructor may have written a longer description explaining what a check is actually asking for, and those descriptions are hidden until you ask for them. Turn on the Show rubric descriptions switch at the top of the rubric sidebar, just above the first rubric’s name, to see them. If a check’s wording is not clear, this is the first thing to try — the detail is usually there.Submission-level checks
Submission-level checks show up as checkboxes or radio buttons in the “Self-Review Rubric” section. Select the relevant option, and enter a comment as required. The menu icon at the top of your entered comment can be used to edit it or delete it.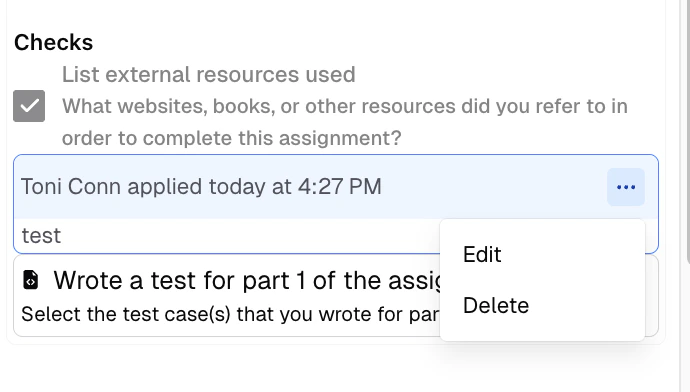
File-level checks
File-level checks are applied as annotations directly on the file. Use the “Files” tab and file list to navigate to the correct file, then apply the check to the line (or lines) of code it refers to. Code is shown in the new editor view, which is on by default. There is a “New editor view” switch above the code if you ever want the plain text view instead; the plain view is easier to read with a screen reader, and applying checks there works a little differently (see below). There are two ways to apply a check in the new editor view. Right-click the line. Put your cursor on the line you want to annotate — or select several lines to annotate a range — and right-click. Alongside the editor’s own items (Go to Definition, Copy, and so on), the menu has:- Apply rubric check… at the top, which opens the search box described below.
- Add Comment…, for leaving a plain comment that is not tied to any rubric check.
- One entry per rubric criteria, each ending in a
▸. Clicking a criteria opens a short list of that criteria’s checks; pick the one you want from there. Checks are always one level down, so you will not apply anything by clicking a criteria name by accident.
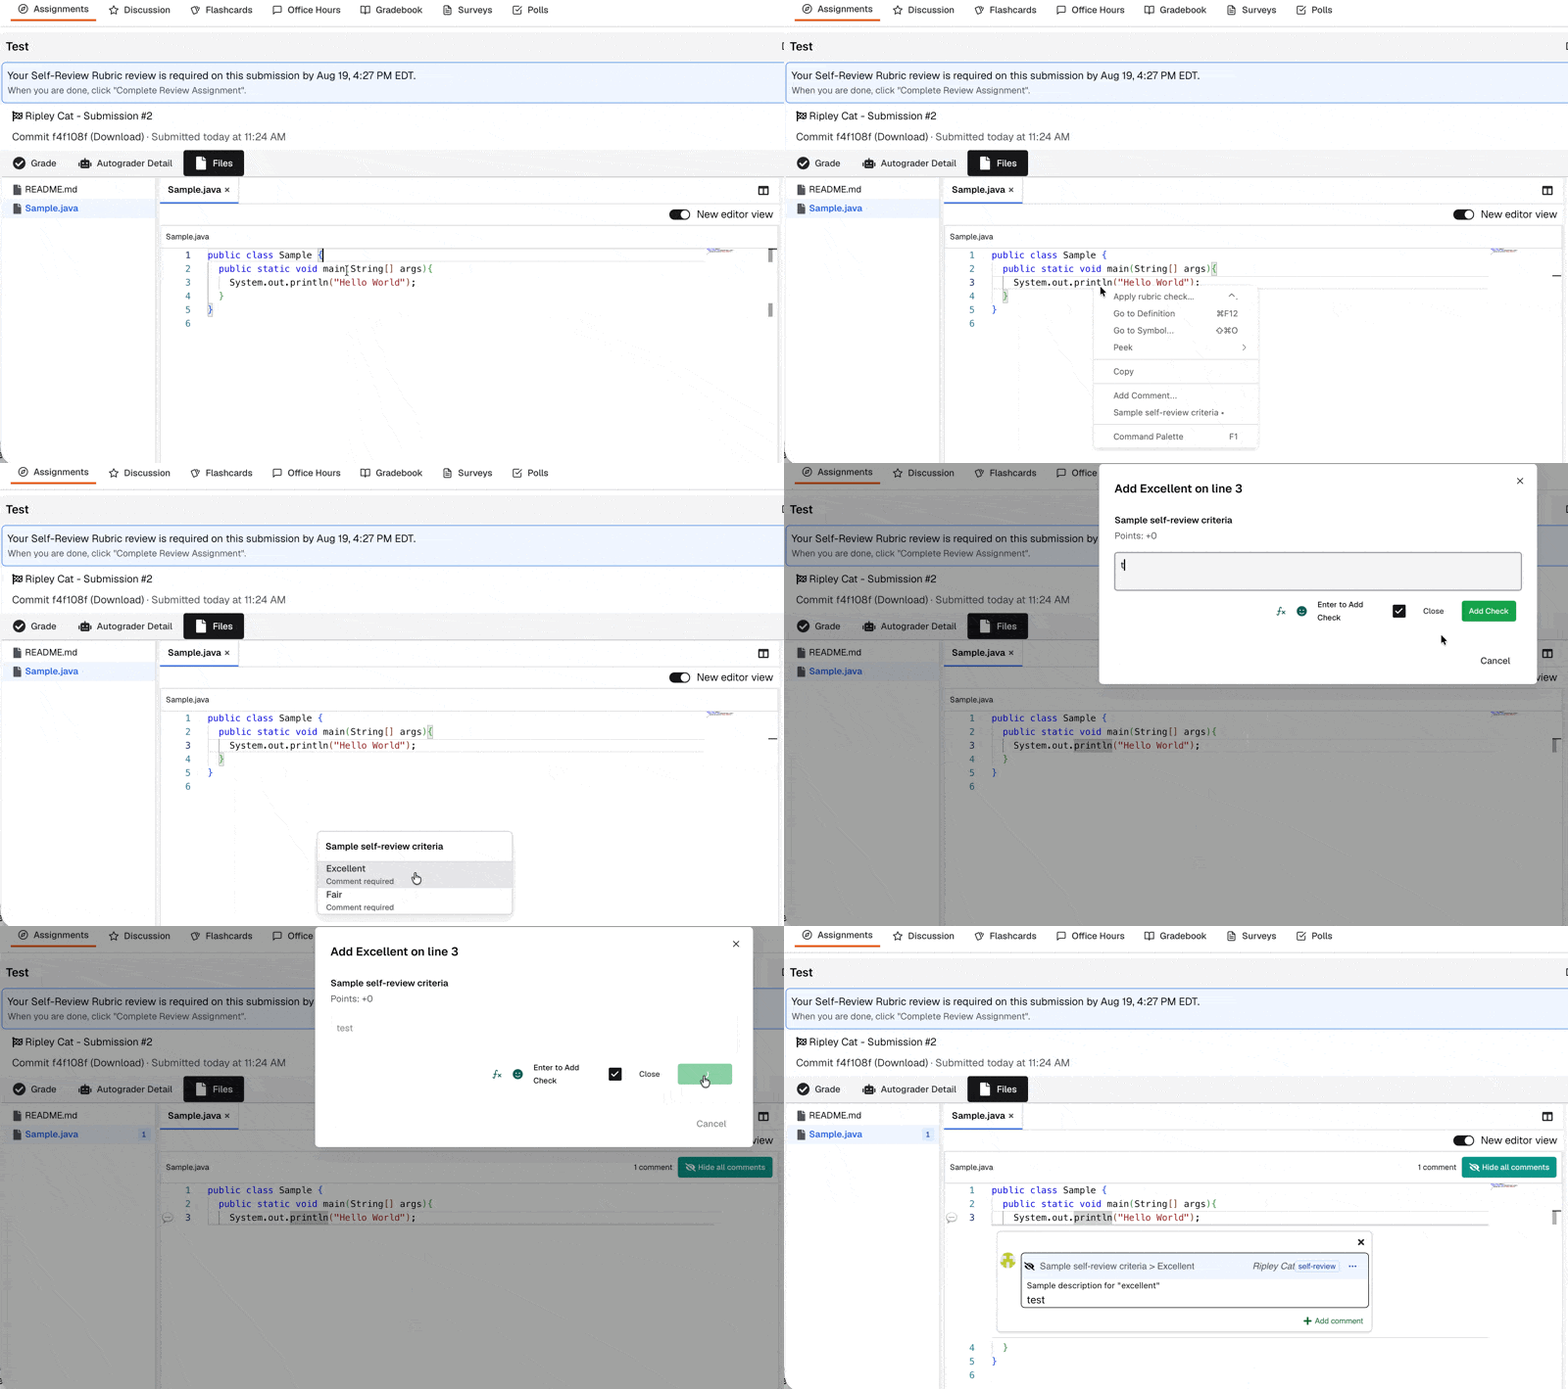
Cmd + . (Ctrl + . on Windows and Linux). This opens a search box for the line your cursor is on. Start typing part of a check or criteria name to filter the list, move through it with the up and down arrow keys and press Enter, or just press the number key shown next to a check to select it. Each check lists its criteria underneath, and says so when a comment is required.
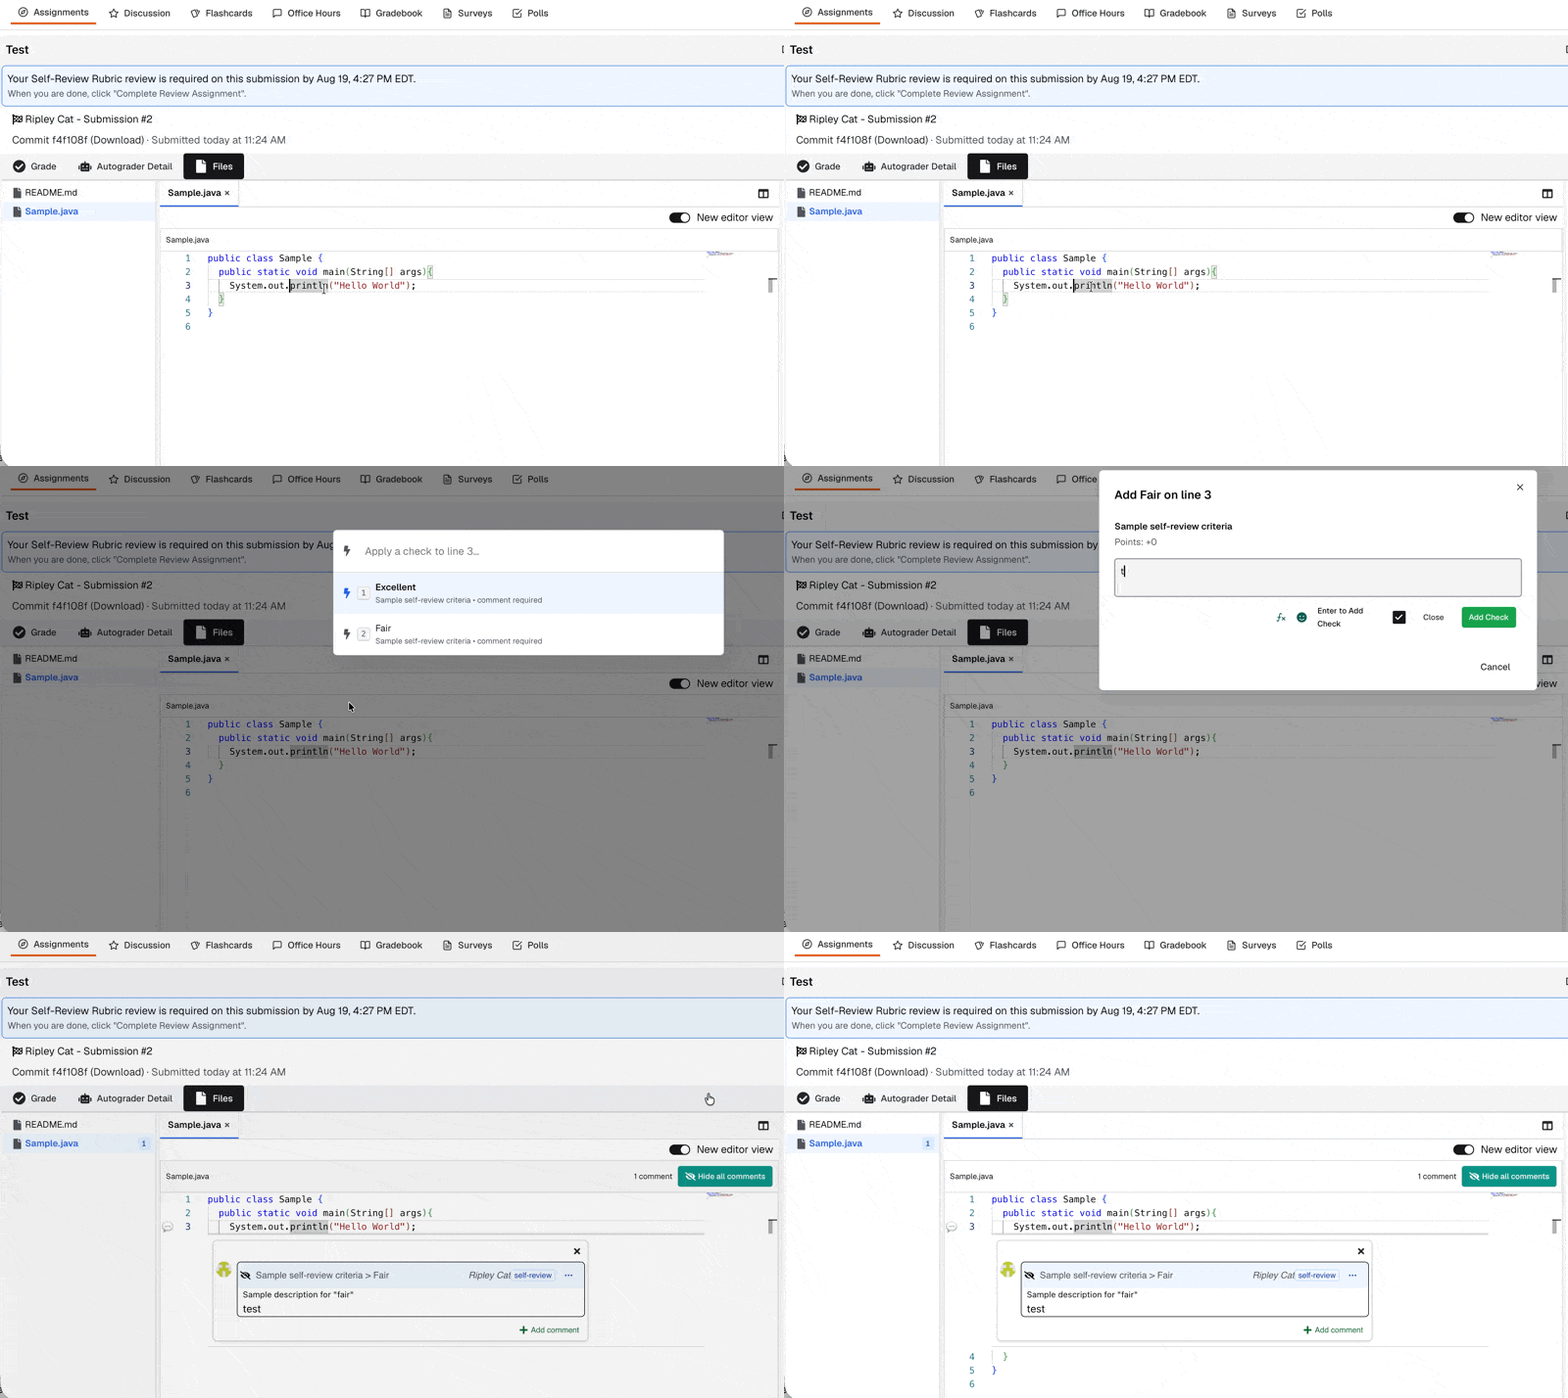
If you have switched to the plain text view, click the line you want to annotate to put the focus on it and then press
Cmd + . (Ctrl + .) to open the same search box. The buttons for applying checks by mouse only appear on lines that already have a comment on them, so on a clean line the keyboard shortcut is the way in.Submitting a Self-Review
Your self-review is not complete until you click Complete Review Assignment, which sits both in the toolbar at the top of the submission and below the rubric in the sidebar. The toolbar says the same thing: “Your Self-Review Rubric review is required on this submission by date. When you are done, click ‘Complete Review Assignment’.” That button opens a popover rather than finishing the review outright. If anything required is outstanding, the popover lists Missing Required Checks and Incomplete Required Criteria by name, with each criteria entry saying how many checks it needs and how many you have applied, and tells you that “You must complete all required checks and criteria before marking this review assignment as complete.” Once nothing is missing, the popover offers Mark Review Assignment as Complete; press that to finish.

Regrade Requests and Self-Review
Self-review rubric items cannot be contested through regrade requests, as they reflect your own assessment of your work. Regrade requests are only available for rubric items that were graded by course staff (instructors, TAs, or graders).If you have concerns about your self-review, contact your instructor directly.