

Submitting a Request
Press New Request in the office hours header. The button is disabled when no queue has staff on duty. With exactly one staffed queue it opens that queue’s form directly, and with more than one it opens a menu so you pick the queue first. The first field, Help Queue, is pre-filled from the queue you arrived from, but you can change it — “Select which help queue to submit your request to”. If the queue you pick has nobody on duty, the field shows “This queue is not currently staffed. Please select a queue with active staff members.” The form also tells you how many requests are already open ahead of you. The form below comes from a course with no request templates and no discussion topics surfaced in office hours, so it renders without the Template field and without the related-posts panel — both of which the sections below describe.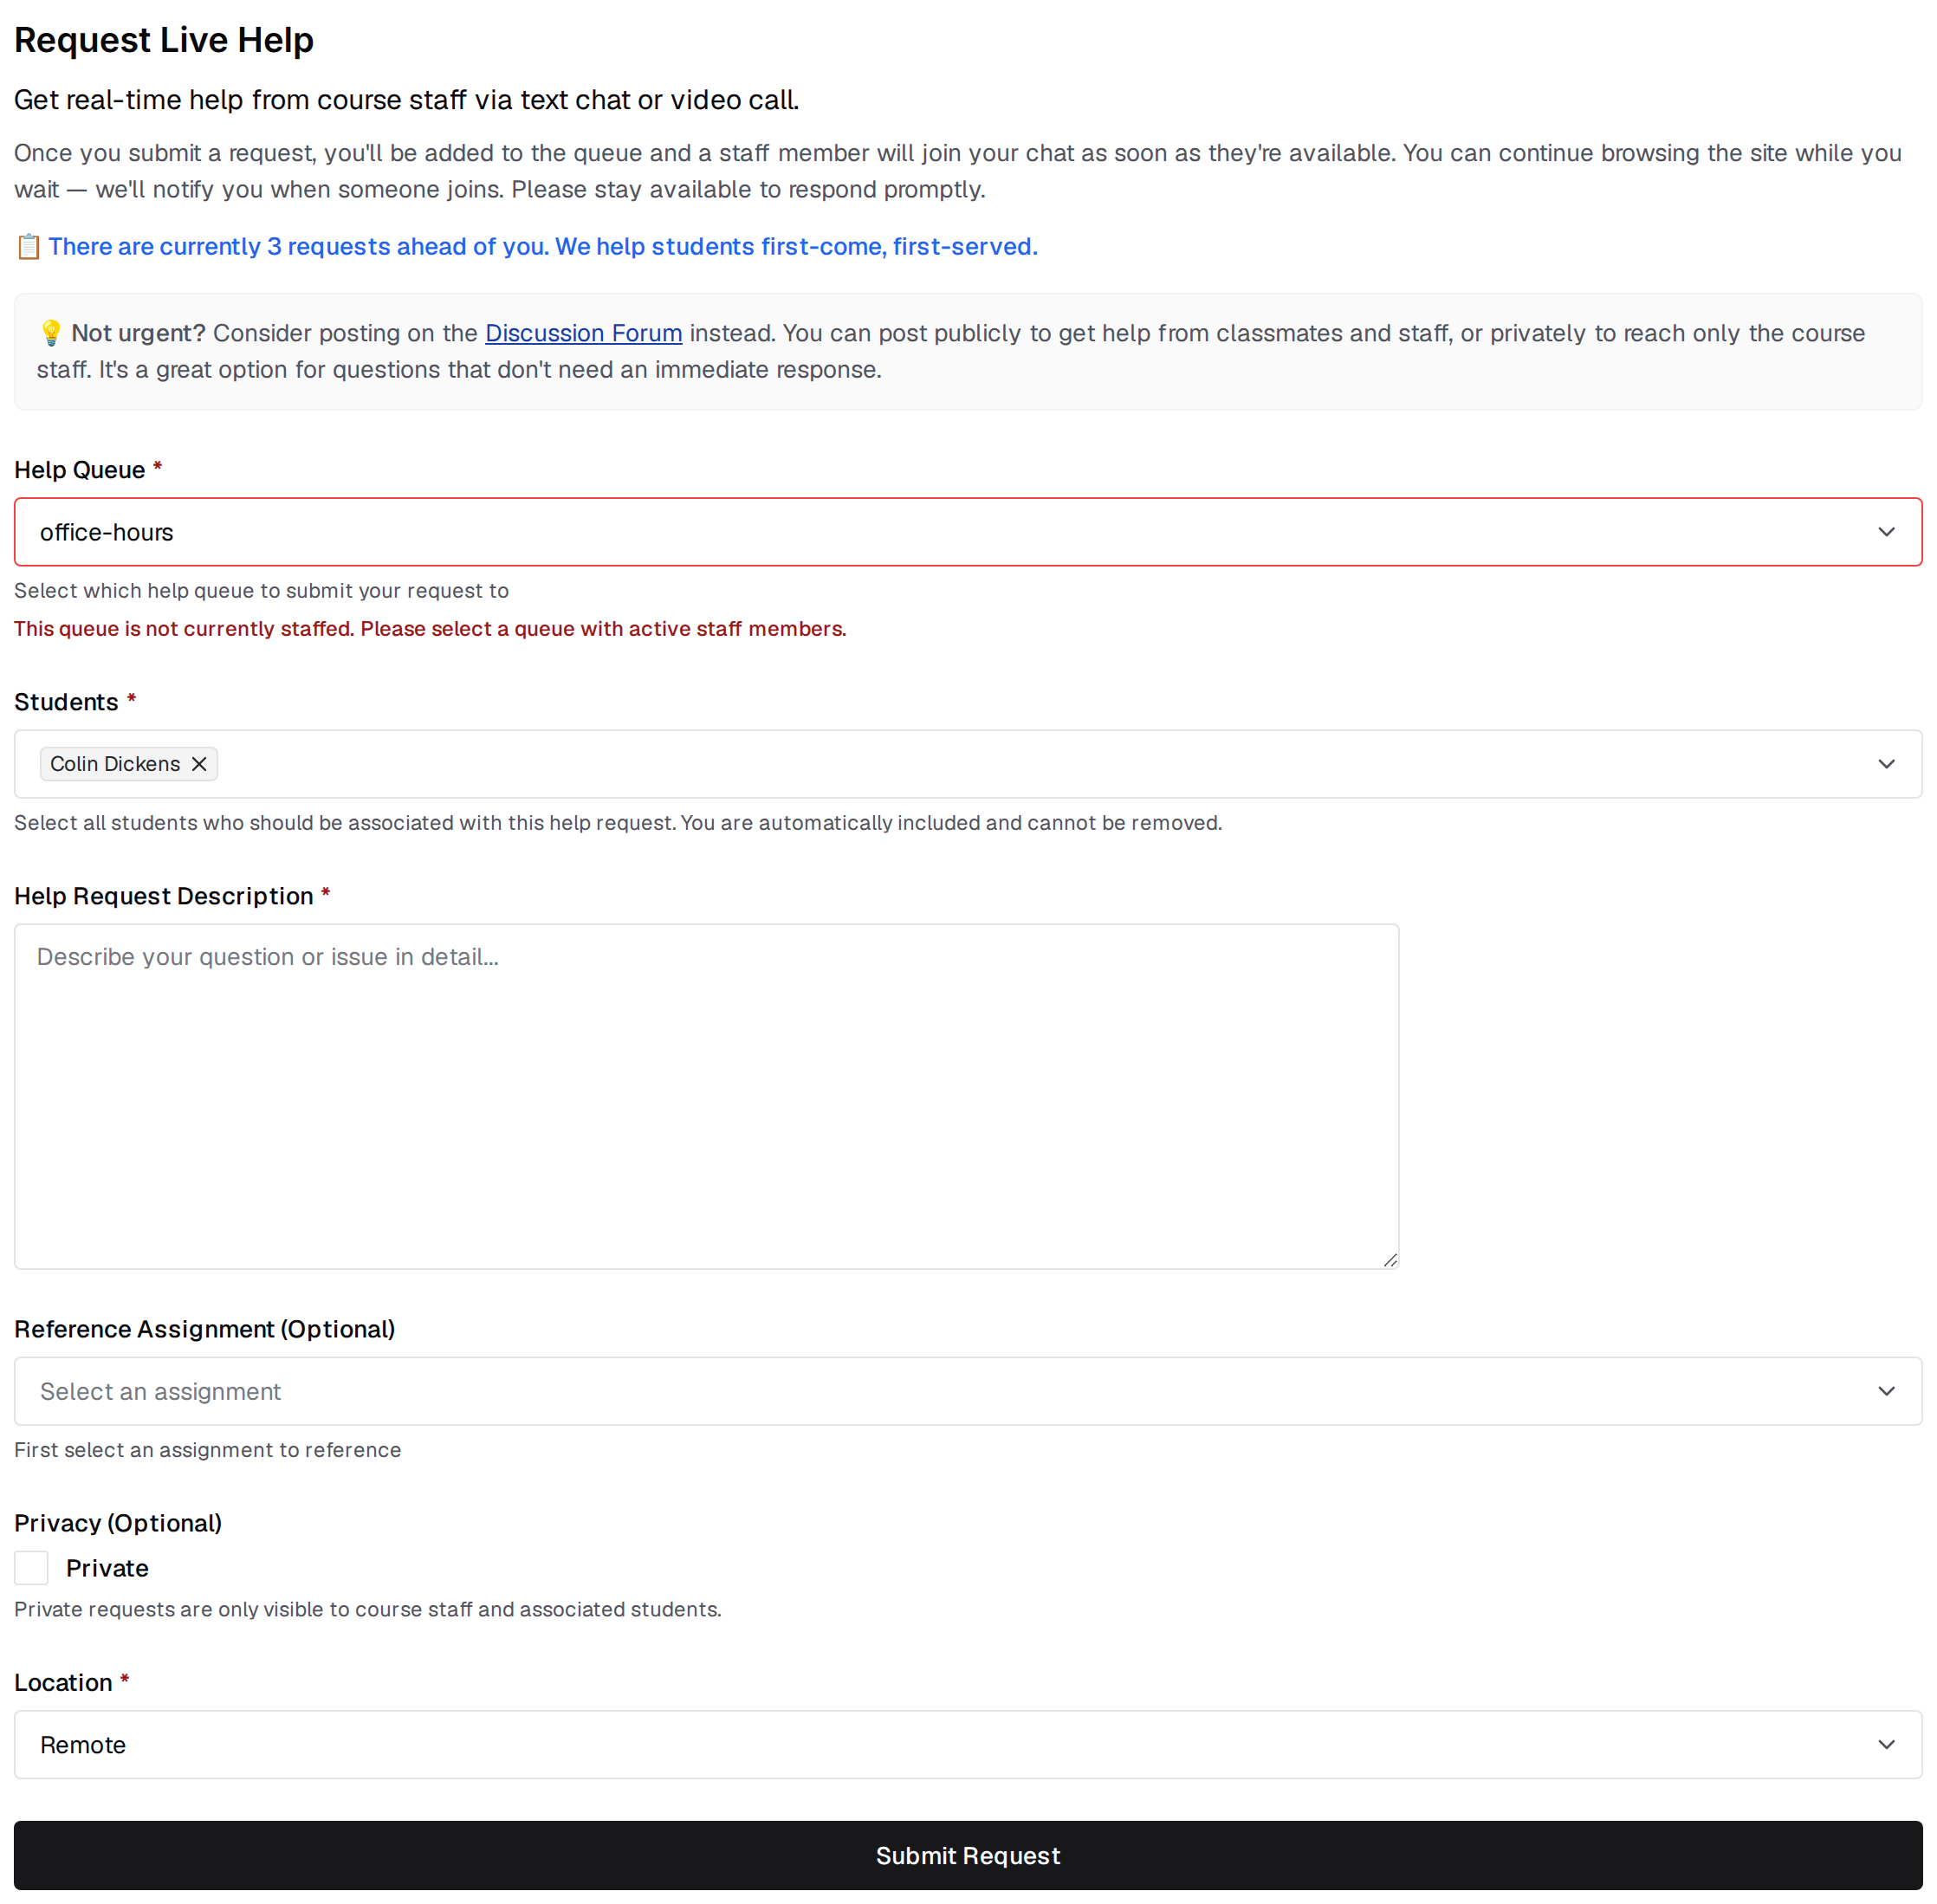
Before You Request Help
When your instructors have marked discussion topics to show in office hours, a Before you request help… panel appears above the form listing threads from those topics, pinned ones first. Show All Related Posts expands the rest, and Browse All Discussion Posts opens the discussion board. The panel is absent when those topics have no posts to show.Request Form Fields
1
Students
You are included automatically and cannot be removed. Add classmates here when you’re working together and want a single shared request.
2
Template
Choosing a template is required whenever your course has any active ones. A template pre-fills the description with prompts such as what you’re working on and what you’ve already tried, which lets staff start helping sooner. When the course has exactly one template, it is applied for you.
3
Help Request Description
Required. Answer the template’s prompts, and be specific about the task, what you have already tried, and any error messages.
4
Reference Assignment, Submission, and Files
Optional. Pick an assignment, then one of your submissions to it, then specific files from that submission. Each file reference takes an optional line number, so staff can open your code at the right place.
5
Privacy
Requests are public unless you check Private, which limits the request to course staff and the students on it. Referencing a submission forces the request private and locks the checkbox.
6
Location
Required, and set to Remote by default. Choose In person or Hybrid when you want to be helped in the room.
You can hold at most two solo requests in the same queue at once: one private and one public. Group requests are not limited.

See also
- During Your Request for what happens once you submit.
- Office Hours for the queues themselves and for searching existing requests.